
Lucy has been home for almost 2 YEARS now- and guess which professional photographer has ZERO framed prints of her newest daughter in her home?! Yep. This one. What’s the saying? The cobbler’s children have no shoes? It’s like that at our house, unfortunately.
Realizing the great need for her sweet face to adorn our walls, I was also feeling all cluttered and anxious about the current state of our living room/dining room gallery wall:
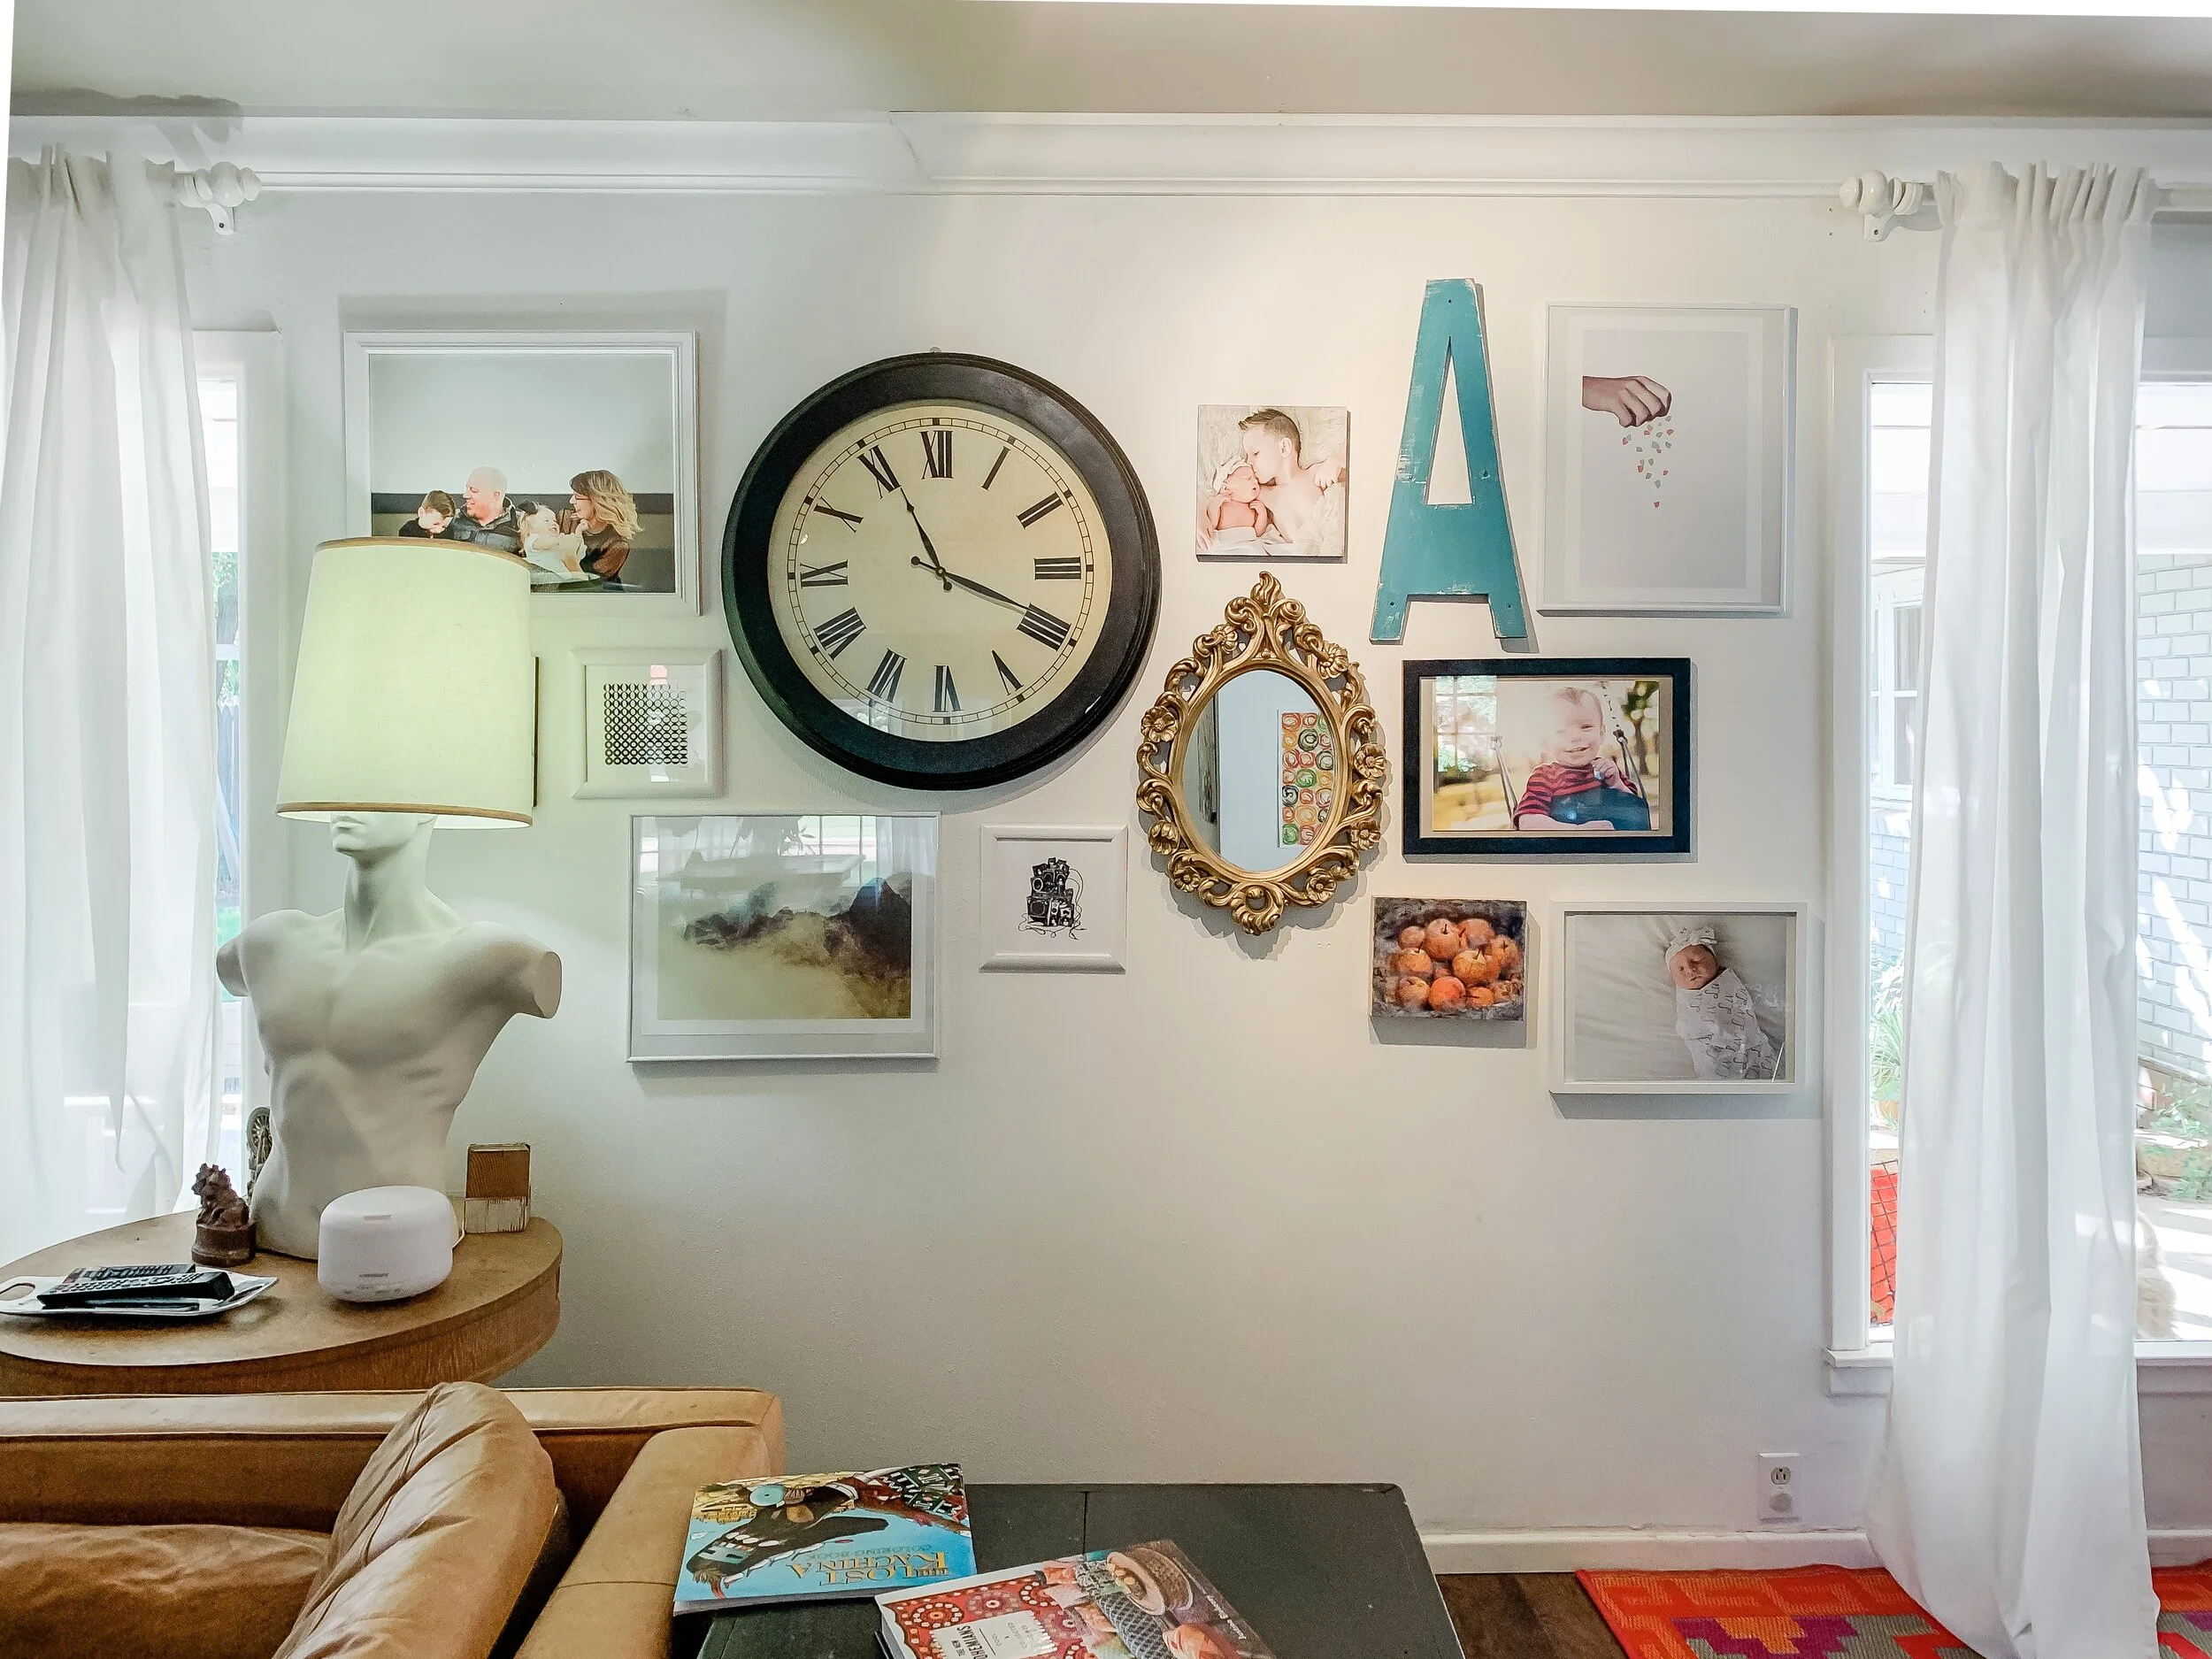
Yes, that is the infamous man lamp. He’s been in the family for years, and he has now relocated to my desk.
Anyway, it was high time for a change. I wanted a simpler gallery wall look and imagined large frames with large white mats. So, my first step was calling up my friend Lauren for some new family photos. Lauren did her MAGIC (seriously, she is magic) in about 10 minutes and the kids were rewarded with giant chocolate bars. I love the photos from this session so much, I’ll have to share them in another post.
If you’d rather watch the video version of this post, feel free to scroll on down!
After measuring the wall and deciding how large I wanted my frames to be, I did a little mock up in Photoshop. I knew I wanted an oversized, floor-to-ceiling look, so I measured the wall and did the maximum size I could.
Wouldn’t that completely cover the wall again?! Yes, but the reason this works from a design standpoint is because the large mats and skinny frames don’t require a lot of visual space.
Tip: If you are wanting to recreate this look, it’s very important that you measure your wall space, and use skinny frames close together (mine were 2 inches apart) with large neutral colored mats.

I originally thought I would do black and white, but that was vetoed by everyone else in the family, and also thought I could fit 8 frames in instead of 6…math was never my forte. It did help me plan and visualize, though!
After a LOT of shopping around, I ended up with these frames from Michael’s. They are technically poster frames, which makes them less expensive, and have plastic instead of glass.
When I first hung up the frames, I was a bit disappointed that you could see the slight bending of the plastic when the light glared on them (revealing that they aren’t truly glass)- this is a little thing that my perfectionist self wanted to fix immediately- but after thinking a bit, the plastic is really a better choice for our family right now- especially since these frames sit lower to the ground.

You can see the bending glare a bit in the above photos.
I ordered these prints from Sam’s Club, of all places! They were having a sale and though I typically recommend mpix.com, I thought it was cheap enough to give it a shot. In the end, I was pretty happy with the way they turned out. I was able to pick them up in 24 hours. They were delivered rolled up, so I flattened them out and put them under a weighted piece of artboard for a couple of days to make them easier to frame.
My frames are 24x36'“, and I ordered 16x20” prints. I thought I would just order custom mats for the frames, since that is an irregular mat size, but Michael’s was going to charge me $38.00 per frame! So, I was super excited when I found FrameItEasy.com. I was able to order exactly what I needed for around $10 per mat.
Click here to get 10% off your order at FrameitEasy.com!
(affiliate link)
The mats fit perfectly and were great quality. I also love that they do framing, and will probably be ordering all-out framed prints from them next time.
I used regular ‘ol masking tape to tape the prints to the back of the mats. I realize this is a no-no in the photography world, as it’s not archival quality and the chemicals in the tape will cause the prints to break down over time, yada, yada, yada….but let’s be real, I’m going to change these prints again before anything like that starts happening.
Once it was time to hang, I began with the center two prints and worked outward, using a level to make sure the lines were all straight. I’m not going to lie- these frames are a total pain to hang with the tiny sawtooth hanger (I MUCH prefer wire across the back), but you only have to do it once. :)
Tip: Even after I had then all hung, they still tilted a bit one way or the other, so I attached velcro command strips to the backs of the frames and onto the walls, which keeps them straight (and in place when a kid decides to ram into one- we have a rambunctious crew, ya’ll).
In the end, I was super pleased with how it turned out! The frames are semi-obstructed by the couch in our living room, but all visible from the dining/kitchen area.
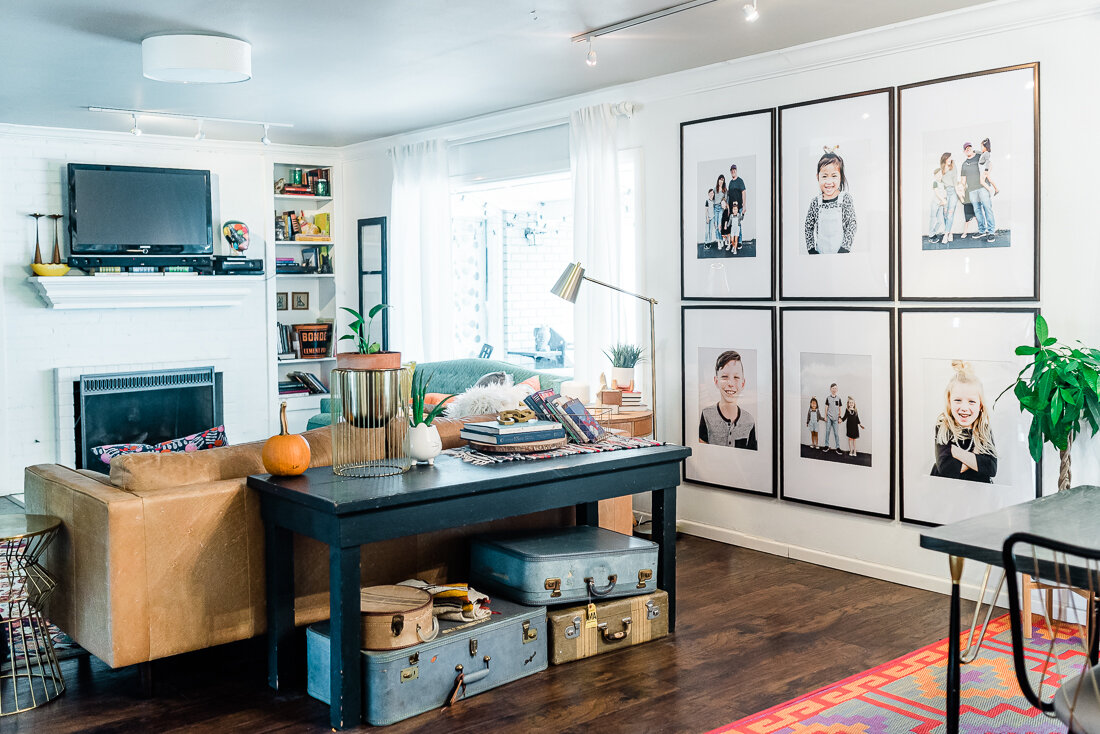
Watch below for a few more details on the process. I hope this was helpful!